How can I use the non-financial data module?
This article explains how to manage your non-financial data in The Business Plan Shop's software.
What is the non financial data module?
The non-financial data module enables you to import and edit non-financial data from other avenues (such as spreadsheets) in order to analyse them in the software.
Importing non-financial data enables you to:
- Analyse the historical non-financial performance of your business
- Define Key Performance Indicators (KPIs) to track your business' performance
In order to import non-financial data you must first configure a financial data source in the data sources module.
How does the non-financial data module work?
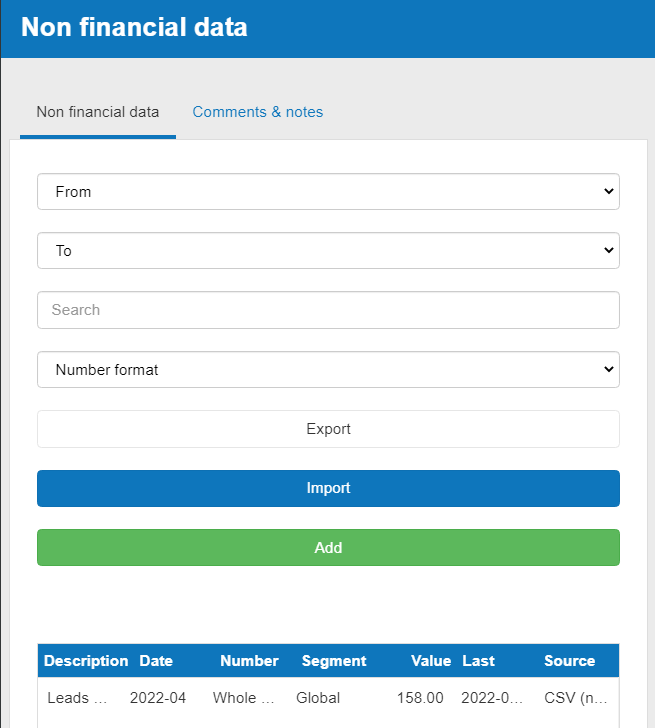
Non-financial data tab
The non financial data tab allows you to view, import, edit and delete non financial data.
Comments & notes tab
The comments & notes tab lets you write important notes about your non-financial datasets that may prove useful at a later stage. These notes can be kept private or shared with other users collaborating on the same business plan.
Frequently Asked Questions
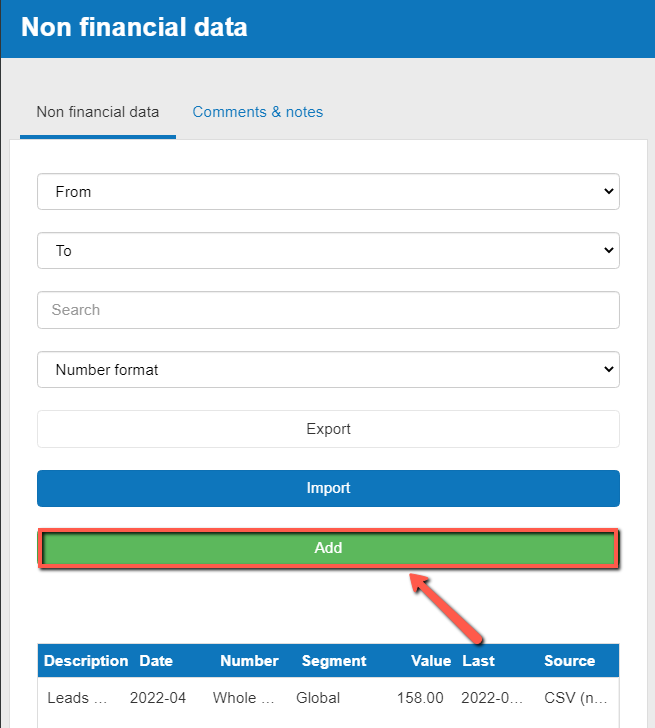
- Firstly, click on the add button above the table
![adding a non-financial data source in The Business Plan Shop's software]()
- You'll receive a message saying Non Financial Data
- You’ll have to enter the date, description and value
- The date will be the date at which the value has been measured
- The description will relate to the configurations you made in the data sources module
- The value will be the value of the description
- Press the save button
- Your non-financial data should now be added
If you are on desktop:
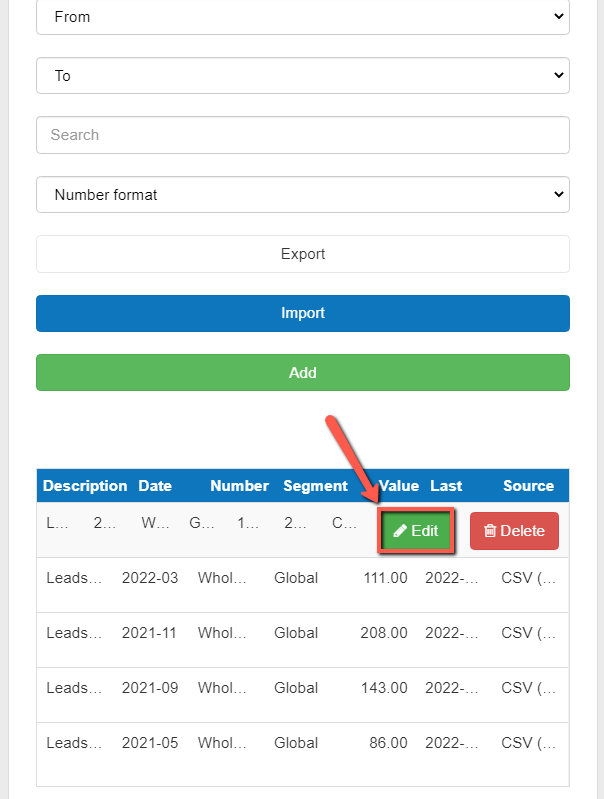
- Firstly, use the filters above the table to locate the data you want to edit
- Hover your cursor over that row. An edit button will now appear
![Editing non-financial data in The Business Plan Shop's software]()
- Click on the edit button and change the value in the modal window (see “How can I add historical financial data?” for an explanation of the available fields)
- Press save
If you are on mobile:
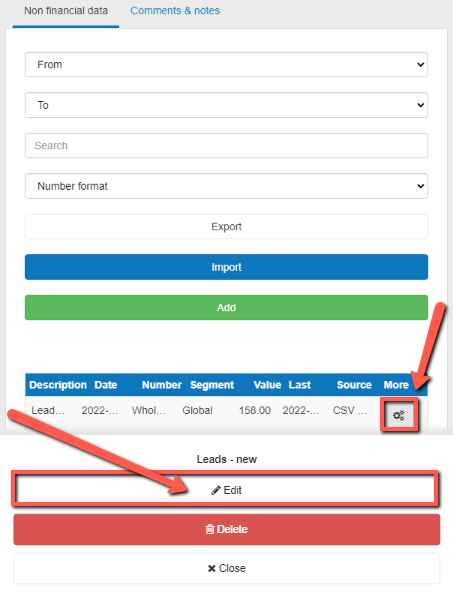
- Firstly, choose the row that you want to edit
- Click on the settings button at the end of the row
![Editing non-financial data in The Business Plan Shop's software on mobile]()
- An edit button will now appear
- Click on the edit button and change the value in the modal window (see “How can I add historical financial data?” for an explanation of the available fields)
- Press save
Note:
- If you want to delete large chunks of data, it might be easier to delete the entire data source and reimport clean data. Or delete a specific field in the data source configuration to delete all data associated with that field.
If you are on desktop:
- Firstly, choose the data that you want to delete
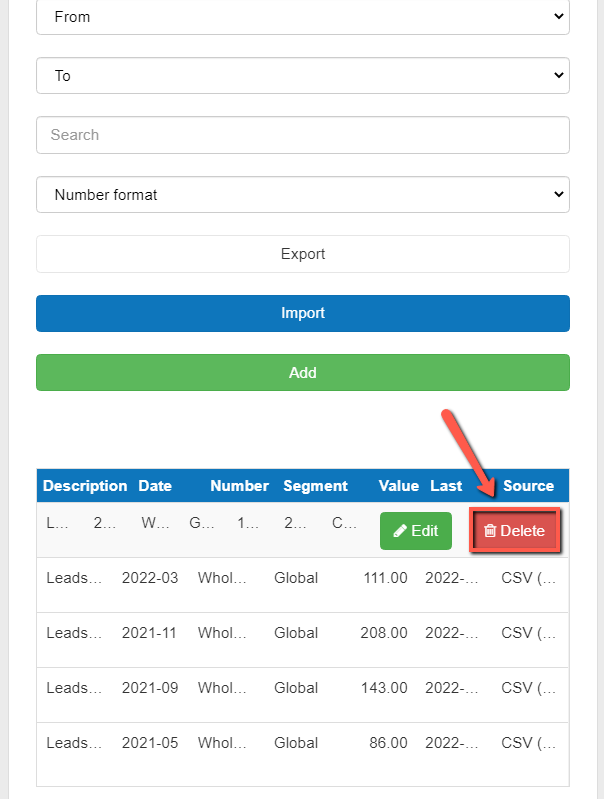
- Hover your cursor over that row
- A delete button will now appear
![delete non-financial data in The Business Plan Shop's software]()
- A delete button will now appear
- Click on the delete button
- You’ll get a confirmation message saying “Delete Non Financial Data”
- Click delete again
- Your data should now be deleted
If you are on mobile:
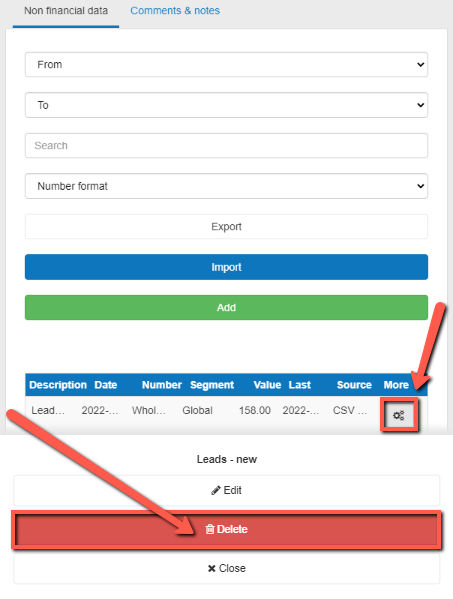
- Firstly, choose the row that you want to delete non-financial data for
- Click on the settings button at the end of the row
- A delete button will now appear
![delete non-financial data in The Business Plan Shop's software on mobile]()
- A delete button will now appear
- Click on the delete button
- You’ll get a confirmation message saying “Delete non financial data”
- Click delete again
- Your non financial data should now be deleted
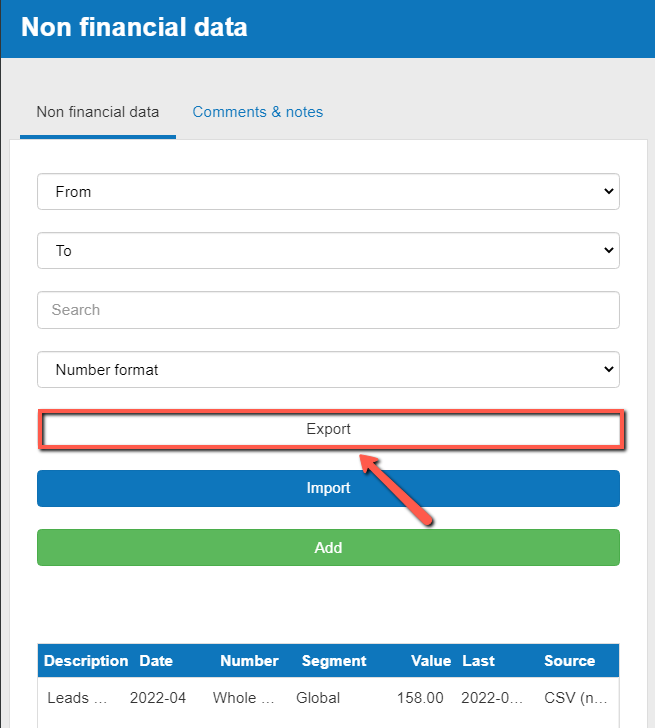
- Click on the export button above the table
![exporting non-financial data in The Business Plan Shop's software]()
- The file will automatically download as a CSV
- You can either view the downloaded file or save it
Make sure you have configured a non-financial data source in the data sources module.
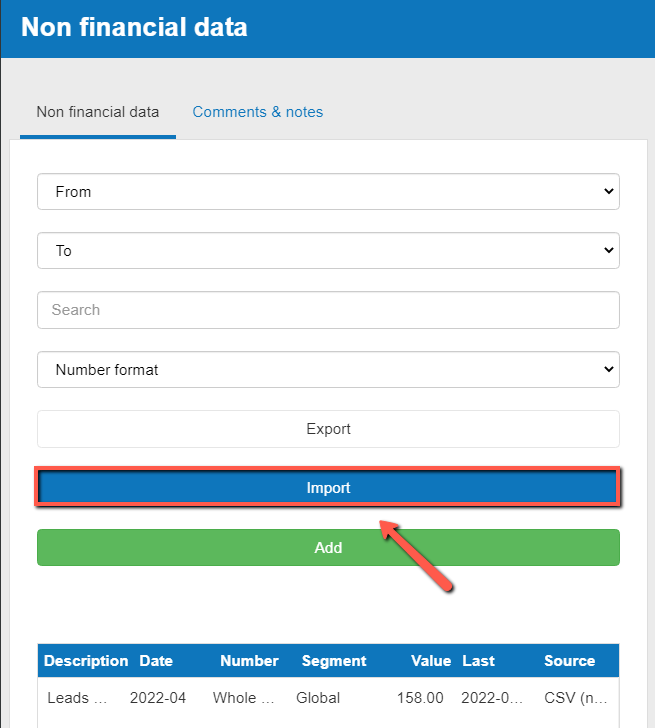
- Firstly, click on the import button above the table
![importing non-financial data in The Business Plan Shop's software]()
- The file must follow this format:
- The first column must contain the import field id configured for the data source (this enables us to map the data to the corresponding field)
- The second column must contain the date for data in format yyyy-mm
- The third column must contain the value
- Click Import
- A notification will confirm the successful import, or show an error message explaining what went wrong
Go further with The Business Plan Shop
Was this page helpful?
