How can I enter capitalized expenses?
This article explains how to enter capitalized expenses in The Business Plan Shop's financial forecasting software.
This data enables our software to build your financial statements (balance sheet, P&L, cash flow statement), which can then be downloaded along with your business plan.
It’s fast and easy to do.

How can I add or edit capitalized expenses in The Business Plan Shop our software ?
Firstly, follow this link to access the other operating items module.
Once you are on the module, you can either click the add button at the top of the list to add a new capitalized expense or edit an existing one.
If you are on desktop, to edit an existing capitalized expense:
- Hover your mouse over the row containing the expense in the list
- Click the edit button that appears
If you are on mobile, to edit an existing capitalized expense:
- Click on the settings icon at the end of the row containing the expense in the list
- Click on the edit button that appears
How does the edit capitalized expenses module work?
The module contains tabs that enable you to enter the financial data required to model the capitalized expenses.
Settings tab
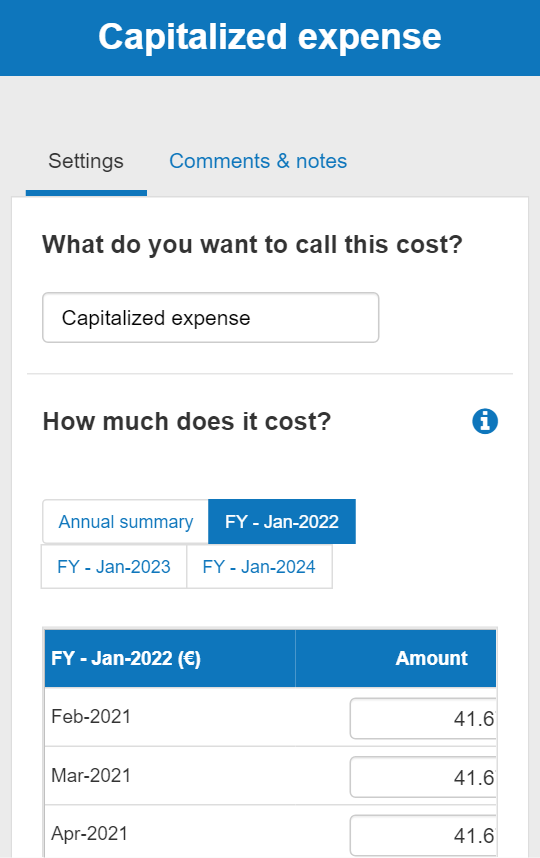
The settings tab allows you to enter the name and the amount for the capitalized expenses.
Note that you can enter the amount monthly or annually. If you enter an annual amount, the software will allocate one-twelfth of the expenses to each month.
Comments & notes tab
The comments & notes tab lets you write down your hypothesis, notes or comments.
Notes are private and only visible to you, whilst comments can be seen by other users you invited to collaborate with you on your plan.
How does the edit capitalized expenses module impact my financial forecast?
The Business Plan Shop's our software will use your capitalized expenses data to create your forecasted financial statements (P&L, balance sheet and cash flow statement).
These statements also form part of the financial plan section of your business plan.
As soon as you save a new capitalized expenses amount, the software will automatically recalculate everything to ensure that your financial forecast is up to date. It’s fast and simple, meaning that your plan will always be ready to export.
When building your forecasted financial statements:
- We’ll use the amount entered to build the capitalized expenses section in your P&L and reflect the impact of this change in retained earnings in your balance sheet.
- When using capitalized expenses, you also need to manually add the corresponding fixed asset created in the investments module.
Frequently Asked Questions
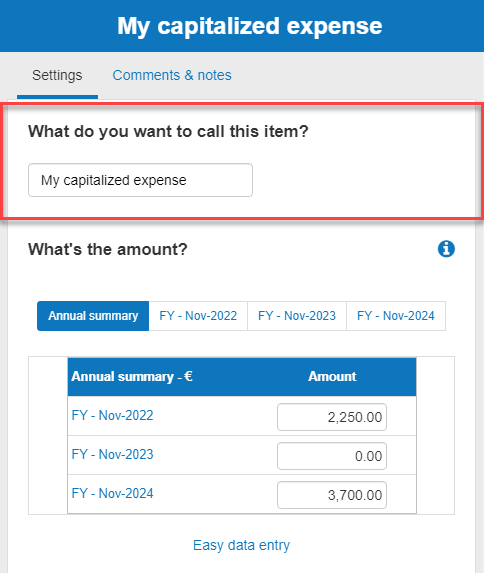
- Firstly, click on the settings tab at the top of this page
- Next, you’ll see a text box with the heading “What do you want to call this item?
![entering the name for my capitalized expenses in the business plan shop's financial forecasting software]()
- Enter your chosen name into the text box given .
- Finally, press the “save and close” button.
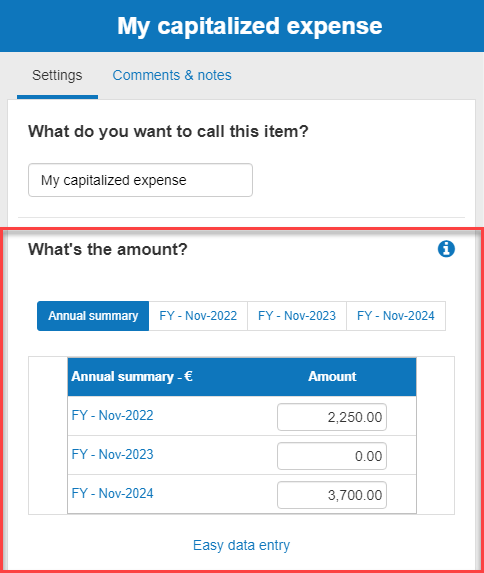
- Firstly, click on the "settings tab" at the top of the page:
- Next, you’ll see a table with the heading "What's the amount?"
![entering the capitalized expenses value in the annual summary]()
- You can enter either annual or monthly data into the table.
How can I enter annual data?
You can enter annual data by clicking on the annual summary, you will a input field for each of the financial years (FY) in your forecast:
You can also enter annual data by filling the “total for the year” field in the monthly view of each financial year.
Use the navigation at the top of the table to toggle between the annual summary and the monthly view of each financial year.
Press the “save and close” button when you are done:
How can I enter monthly data?
Use the navigation at the top of the table to select the monthly view of the financial year for which you wish to enter data.

Then enter the amount for each month and press the “save and close” button when you are done:
Notes:
Mensualisation
By default when you enter an annual figure, our software will allocate one-twelfth of the total amount to each of the 12 months.
For example, if you enter £48,000 in the “total for the year” for Year 1, the software will allocate £4,000 to each of the 12 months leading up to that period.
Financial years
In The Business Plan Shop, the financial year always includes 12 months and is defined using the start date entered when creating the forecast (if needed you can change that value in the options).
For example:
- If your forecast starts in January: your financial year will run from January to December.
- If your forecast starts in March: your financial year will run from March to April.
Financial years are formatted using the last month in the period. For example a financial year running from January to December 2022 will be displayed as FY - Dec 22.
It is therefore possible that your forecast’s financial year will be different from your accounting financial year.
That’s OK, using 12 full months for each financial year is a best practice when forecasting as it makes the data between years comparable (which wouldn’t be the case if one year had 3 months and the others 12).
Investors and lenders would rather get an accurate projection using the most up to date information than dates matching your accounting or fiscal year end.
If there are tax implications, for example if your corporation tax bill is based on a different fiscal year end, you can use a custom tax model in the options where you can use a fiscal year end that is different from the financial year end used for forecasting.
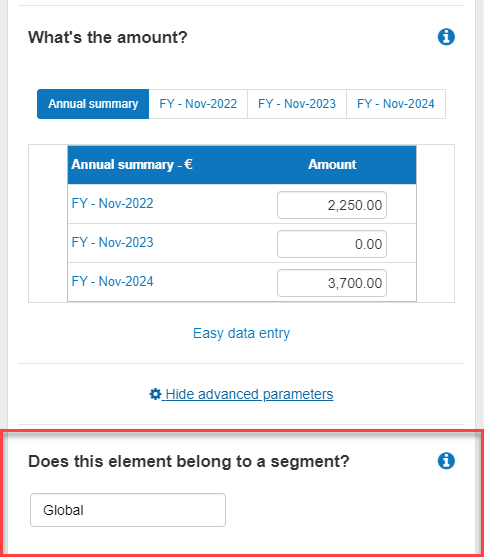
Classifying your capitalized expenses by segment allows you to group expenses in your forecasted financial statements.
This means that you can breakdown and adjust the level of details when you export your business plan.

To classify your capitalized expenses by segment:
- Firstly, click on the settings tab at the top of this page
- Next, scroll down to the bottom of the page and click on “show advanced parameters”
- You’ll see a text box with the heading “does this element belong to a segment?

Enter your chosen segment name into the text box given
- If you don't want to use a segment leave the field empty or on “Global”
Finally, press the “save and close” button
Go further with The Business Plan Shop
Was this page helpful?

